Package Information
Available Nodes
Documentation generating…

Documentation
Face Transform for n8n: first face analysis
Analyze facial keypoints in an image you are authorized to use. This package connects n8n to the single Ace Data Cloud Face Transform service. The screenshots below show an actual self-hosted n8n 2.42.3 instance in English. n8n Creator Portal verification is pending.
Package: @acedatacloud/n8n-nodes-face-transform · Source: FaceTransformN8N · Privacy: PRIVACY.md
Quick start
1. Install the community node
In a self-hosted n8n instance, sign in as an owner or admin. Open Settings → Community nodes → Install, enter @acedatacloud/n8n-nodes-face-transform, review the package name and author Ace Data Cloud, accept n8n's installation notice, and select Install. The server must reach npm and api.acedata.cloud over HTTPS. n8n's installation guide covers instance prerequisites.
n8n Cloud shows verified community nodes in its picker after approval. Check the current picker before assuming this package is available there.
2. Get a Key with Face Transform access
- Sign in at Ace Data Cloud → Applications.
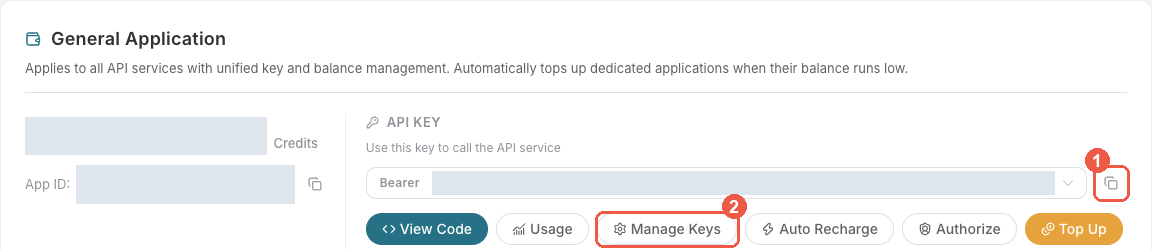
- Open General application and copy its API key, or choose Manage Keys → Create to issue a separate n8n key.
- Check Face Transform access, current pricing and balance. If you enable Allowed APIs, include
/face/analyzefor the first workflow. Add other/face/*paths only for operations you use.
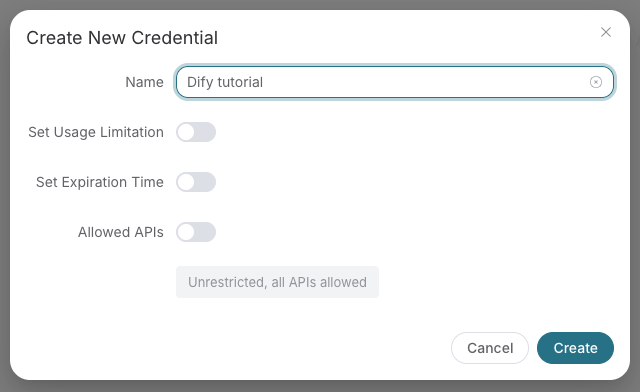
For a separate key, choose a name and expiration, create it, then copy the token.
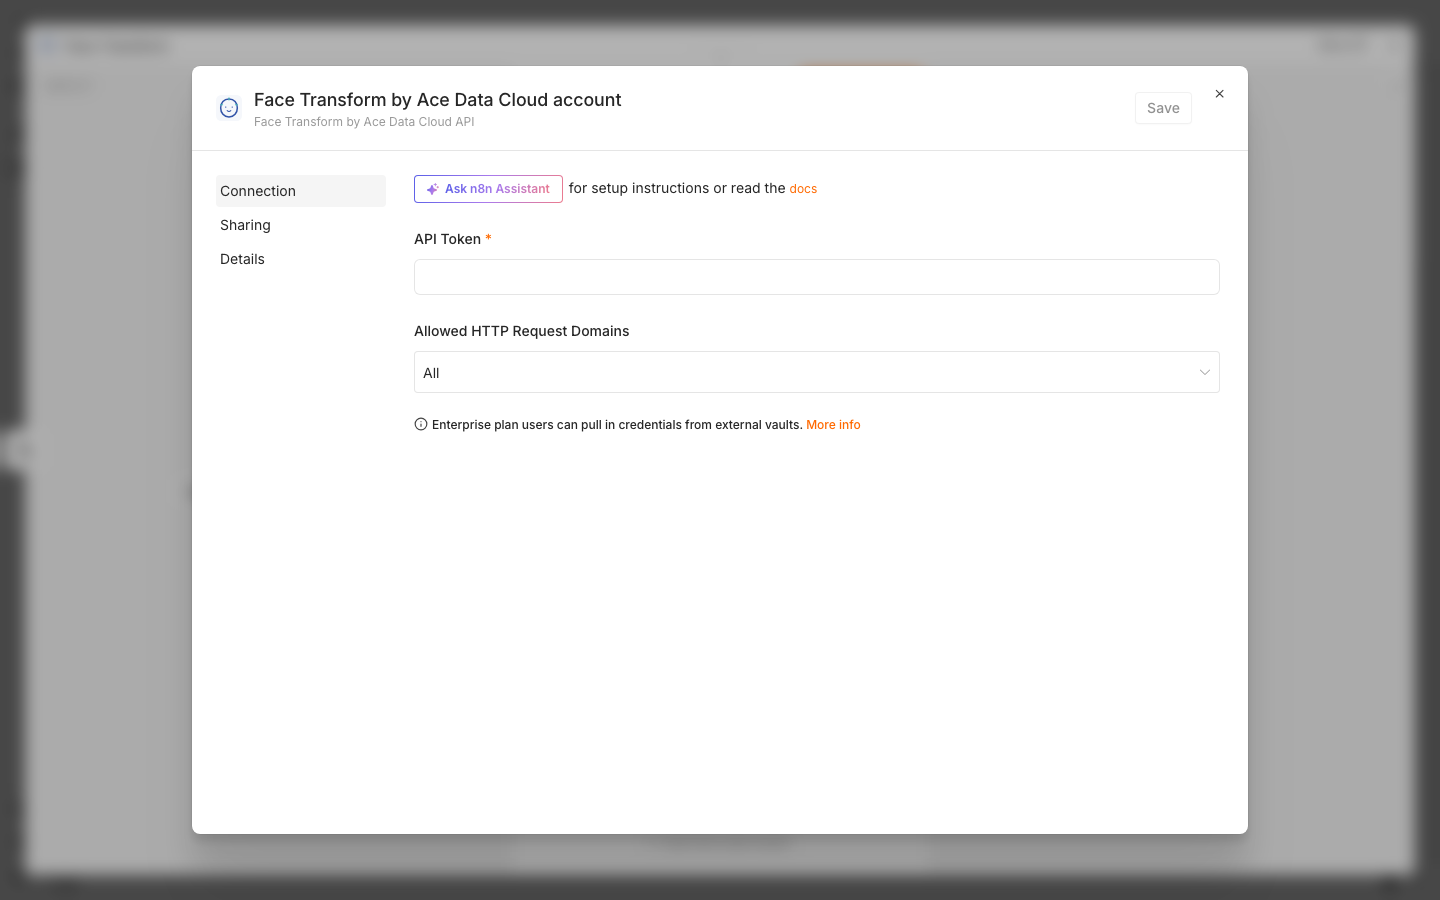
Copy only the application token. Do not include Bearer or quotation marks. Keep it out of workflow exports and screenshots.
3. Save the credential in n8n
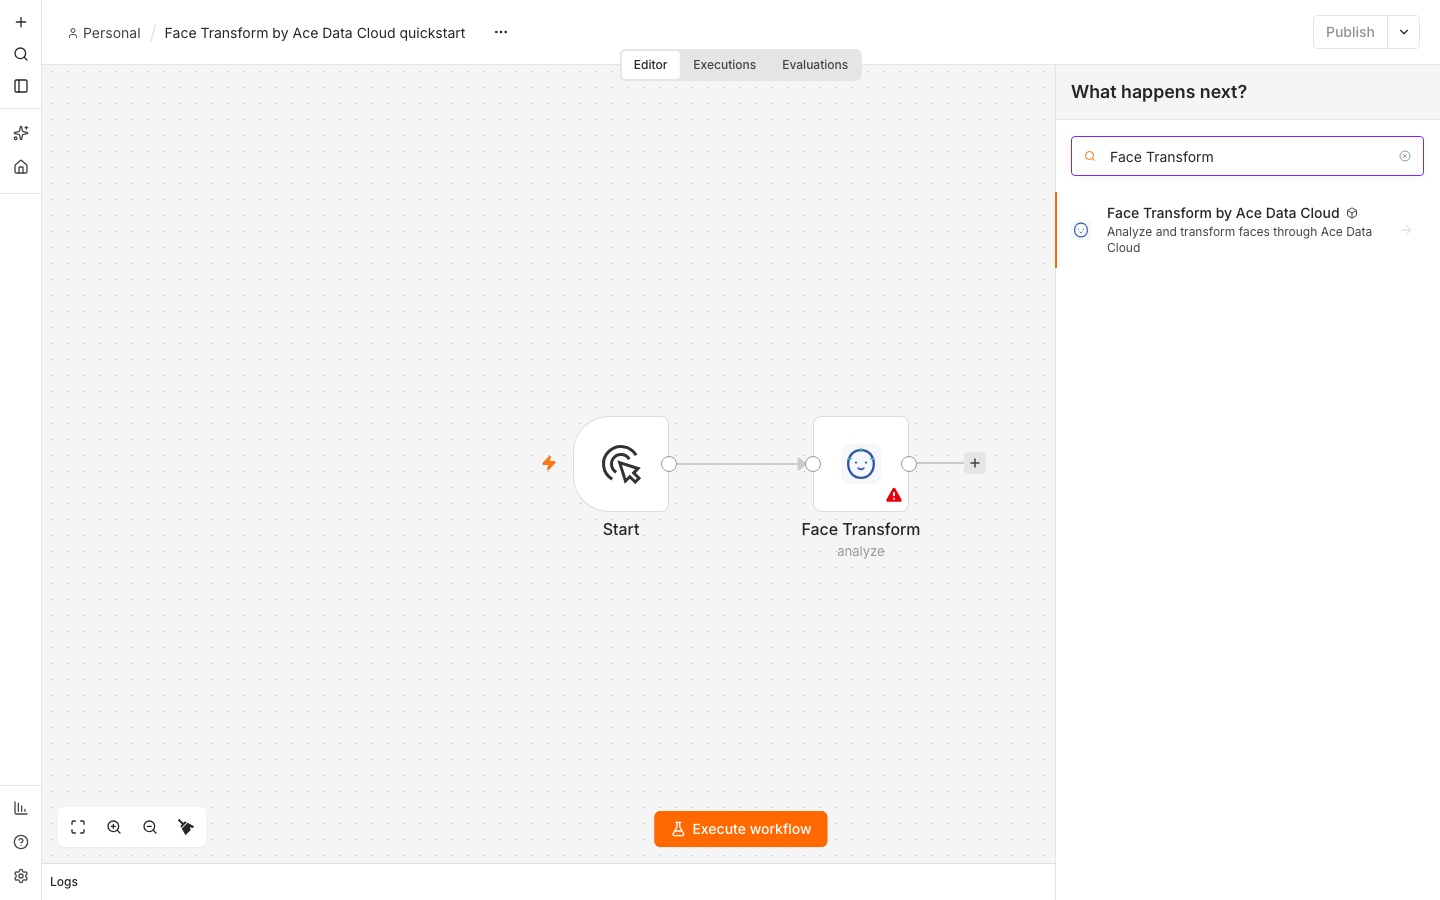
Create a workflow and add Face Transform by Ace Data Cloud. In Credential, select Connect to Face Transform by Ace Data Cloud API and Create new credential. Paste the token into API Token and save. Set Allowed HTTP Request Domains to Specific Domains → api.acedata.cloud for a narrowly scoped credential. n8n stores the masked token and sends the Bearer header.
The credential test uses the free /openai/models metadata route. It checks whether the token works, while the first Face Transform execution checks service access.
4. Import and run the smallest workflow
Download the credential-free quickstart, then use the workflow's ⋯ → Import → From file action. Assign your credential to the Face Transform node. The two-node flow is Manual Trigger → Face Transform. It contains a previously generated fictional portrait.
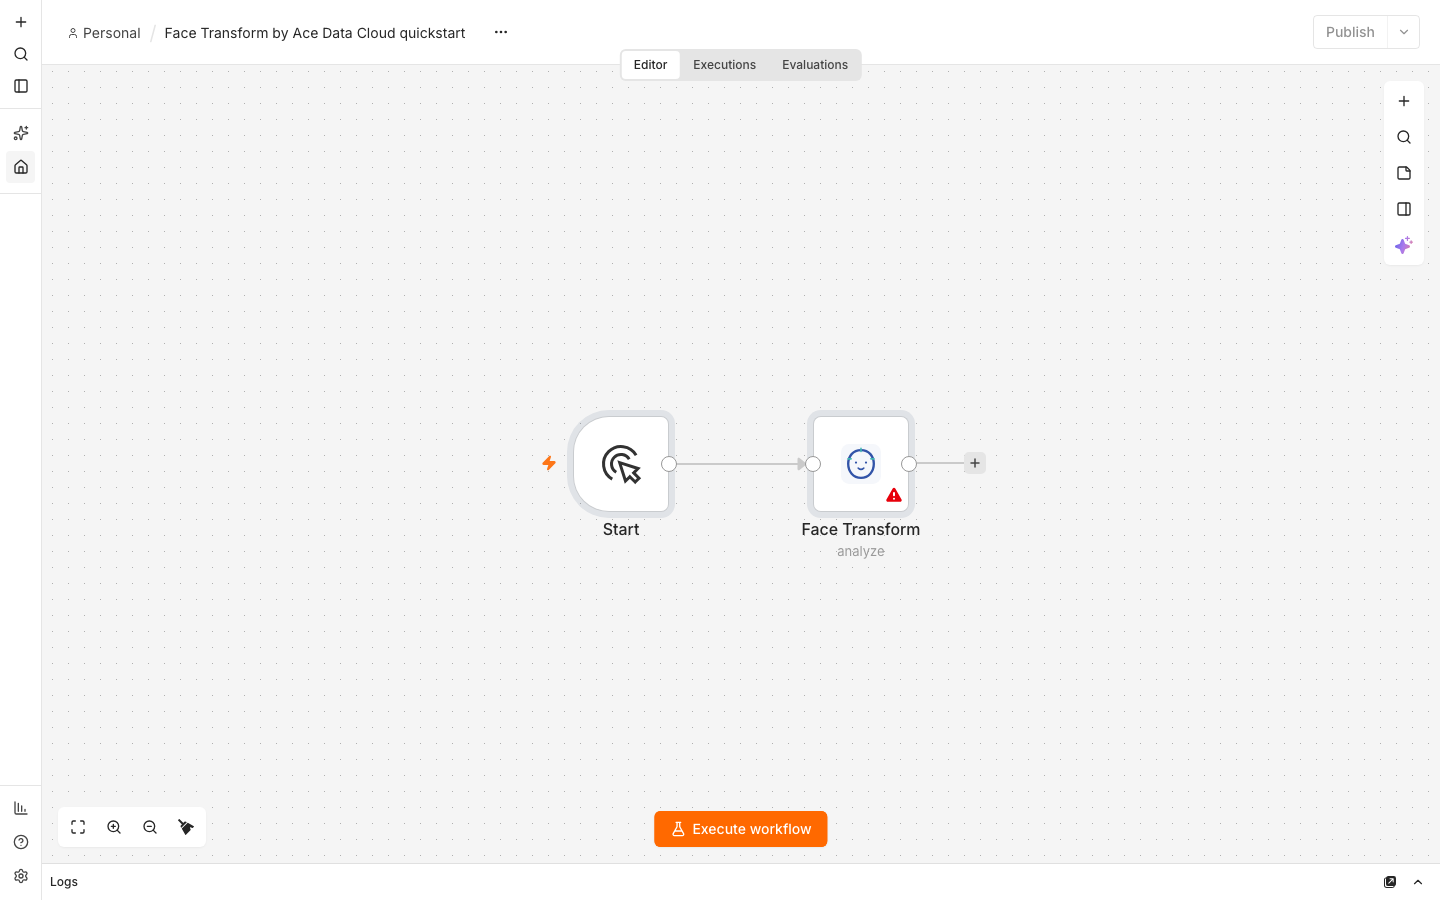
| Field | First-run value |
|---|---|
| Operation | Analyze Keypoints |
| Image URL | https://platform2.cdn.acedata.cloud/seedream/00355681-7e81-49a4-a8fc-d2165fe1e9fd.jpg |
| Analyze Mode | Largest Face |
| Rotate Detection | Off |
Keep Retry On Fail off. Select Execute workflow once. The analysis returns synchronously: no task ID or polling node is needed. Use your own authorized public HTTPS image URL after the example works.
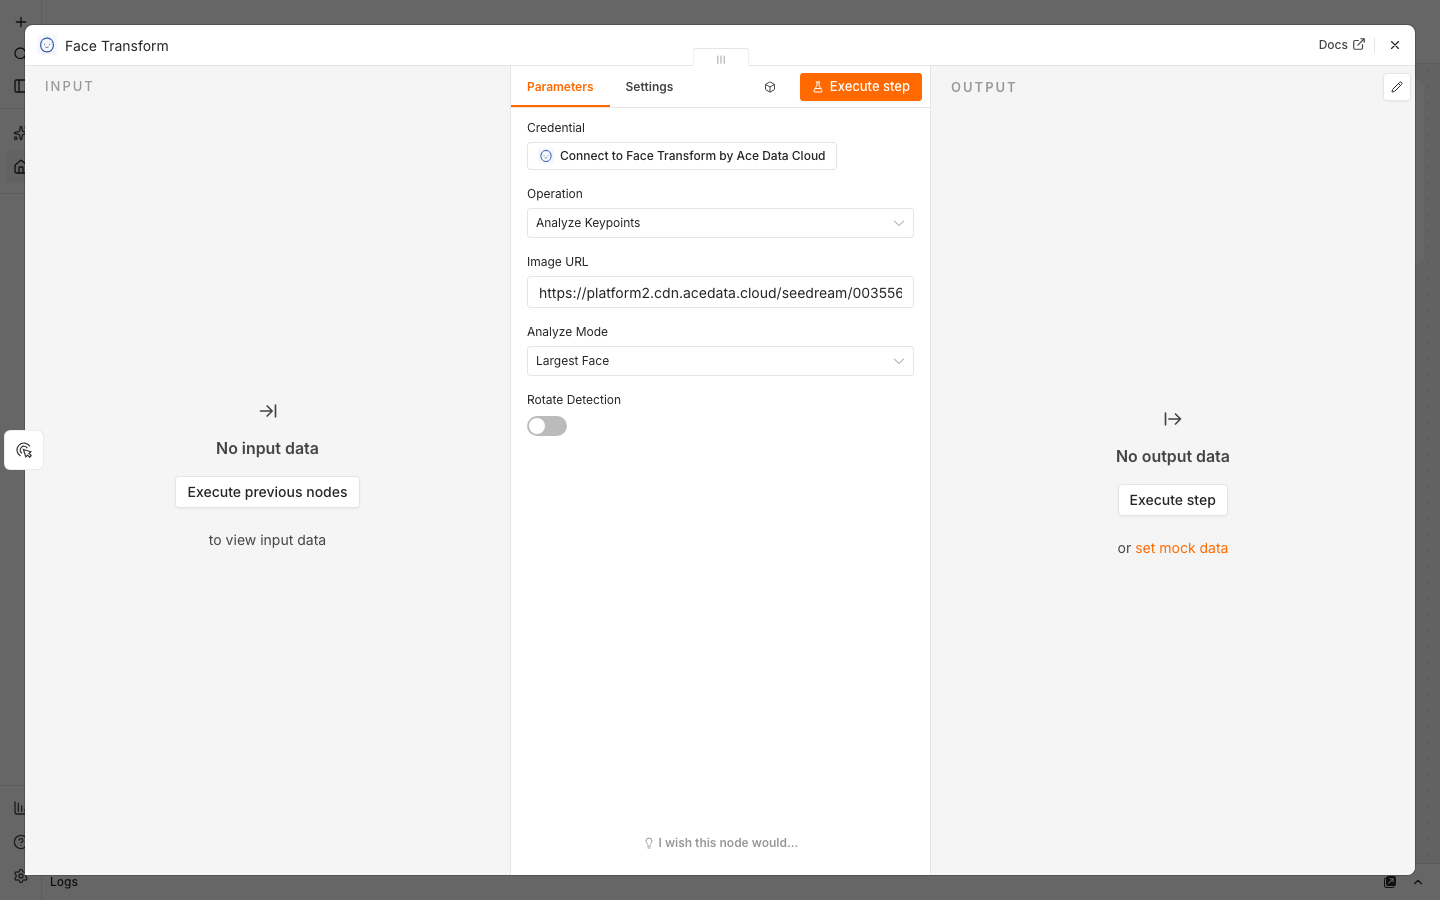
5. Read the result and charge
Open the Face Transform output. face_shape_set contains detected landmarks; image_width and image_height describe the input. An image with no detectable face can yield an empty set. Other operations may return image_url or a liveness score instead. Use the fields from your actual result downstream.
One previous Face Transform analysis through Ace Data Cloud deducted 0.0025 Credits; this is an example, not a guaranteed price for your key or operation. Check the current price before running and compare your n8n execution time and trace ID with Ace Data Cloud usage history. cost.amount, when present, is in Credits, not USD.
Other Face Transform operations
The same node offers Beautify, Change Age, Change Gender, Swap Face, Cartoonize and Detect Liveness. Each input item sends exactly one request to the corresponding /face/* endpoint. Age Information accepts a JSON array such as [{"age":30}]; Gender Information accepts [{"gender":0}] for male to female or [{"gender":1}] for female to male. For Swap Face, Source Image URL is the face to apply and Target Image URL is the image receiving it. Swap runs synchronously; this version does not expose callbacks. The seven mappings have contract and mocked request tests; a live n8n call is still pending.
| Error | Next step |
|---|---|
| 401 or 403 | Check the full application token, expiry, Face Transform access, balance and Allowed APIs. |
| 400 | Check HTTPS image URLs and operation-specific fields; use a clearly visible, front-facing face. |
| 429 | Reduce concurrency and check service limits. Keep automatic retries off. |
| Timeout or 5xx | Inspect the original request and usage history before resubmitting; the first request might have been charged. |
Only process images with permission. Face Transform APIs are currently in Alpha, so review the current API documentation and pricing when building a production workflow. Report an issue · dev@acedata.cloud